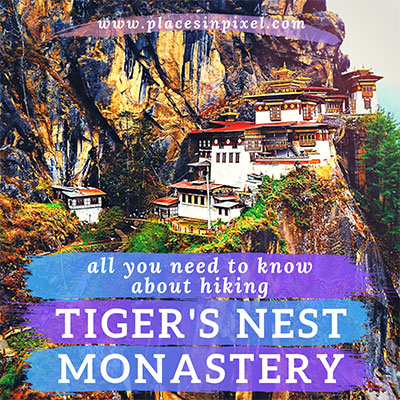
When Thimphu and Punakha can proudly boast of majestic dzongs and other awe-inspiring architectures and monuments, how can Paro be left behind. If you ask anyone who has traveled to Bhutan about their most awesome experience, I guess it will unanimously be Paro Taktsang a.k.a. Tiger’s Nest trek!
Bhutan in general and Paro in particular is a walker’s / hiker’s paradise. Paro being a small city, you can practically walk around the city while exploring locals bazaars, night evening markets and souvenir shops (and that’s exactly what we did..).
But the Tiger’s Nest Monastery is no ordinary hike. Its one of the most challenging hike / trek in Bhutan. Located at an elevation of over 10,000 feet, Paro Taktsang is the birthplace of Bhutanese Buddhism. Legend has it that Guru Rinpoche flew here from Tibet on the back of a tigress which was the manifestation of his divine consort Yeshe Tsogyal. Guru Rinpoche then meditated at a holy cave here for 3 years, 3 months, 3 weeks, 3 days and 3 hours, to subdue the demons there. And hence the name – Tiger’s nest !!
But Paro city isn’t just about Tiger’s Nest Monastery. There are many interesting things to do in Paro city as well. So, before we start about the hike, here are a few points about Paro city:
- Bhutan’s only international Airport is in Paro. There is a ‘birds-eye-view‘ point where you can catch a glimpse of a wonderful take-off and landing of flights on a runway that is locked by mountains on all sides! A rare and pleasing sight.
- Paro proudly boasts of having the largest dzong in Bhutan – Rinpung Dzong. The real delight is seeing it at sundown – the golden hour!
- Other places of interest in Paro is the National Museum of Bhutan – haven for history buffs and the Kyichu Lhakhang.

Hiking up the Tiger’s Nest Monastery
A scenic, but not-so-easy stairway to heaven, especially without the Flying Tigress!! 😉
Preparation and Planning
To start with, we would suggest everyone set aside an entire day for Tiger’s Nest trek. Its not because many visitors say that the hike is very difficult (its actually not that difficult). The main reason is because we would suggest that you hike at a slow pace while enjoying the scenery around you. Its one of those rare hikes wherein not only the destination is awesome, but also the journey is spectacular. Enjoy the scenic beauty and take lots of photos (bring out the shutterbug inside you – make sure to keep your camera battery charged)
Tiger’s Nest was the perfectly planned climax of our Bhutan trip – on our second last day we hiked our way up to this legendary monastery – Paro Taktsang.
How to reach Paro Taktsang
We started early from our hotel (~7 am), and before leaving, we did a healthy and sumptuous breakfast. It is approx. 12 km from the city to the car-parking of Paro Taktsang (starting point of the hike) and it will take you around half an hour to reach there.
Pro tip:
If you have not hired a tour guide/cab for the entire tour, we would strongly suggest that you book a cab for reaching Tiger’s Nest trek. And it’s best to do it on the previous day itself, so that the cab comes for your pick up early in the morning. We were lucky that one of the locals gave us this tip and we booked a cab from the taxi stand.
1st Leg: Starting point to Taktsang Cafeteria
There will be people selling souvenirs and hiking / walking sticks in the parking area. And this is the place to hire a horse if necessary – horses are allowed to go only half the distance. We strongly recommend not hiring a horse and doing it yourself.
Right after the parking zone, the hike starts with a gentle forest climb, past the multi-colored Himalayan prayer flags. Just a few minutes in to the hike and we got our first glimpse of the Tiger’s Nest Monastery perched on the edge of a steep cliff. (..and in just a matter of 3 hours we were up there too!)
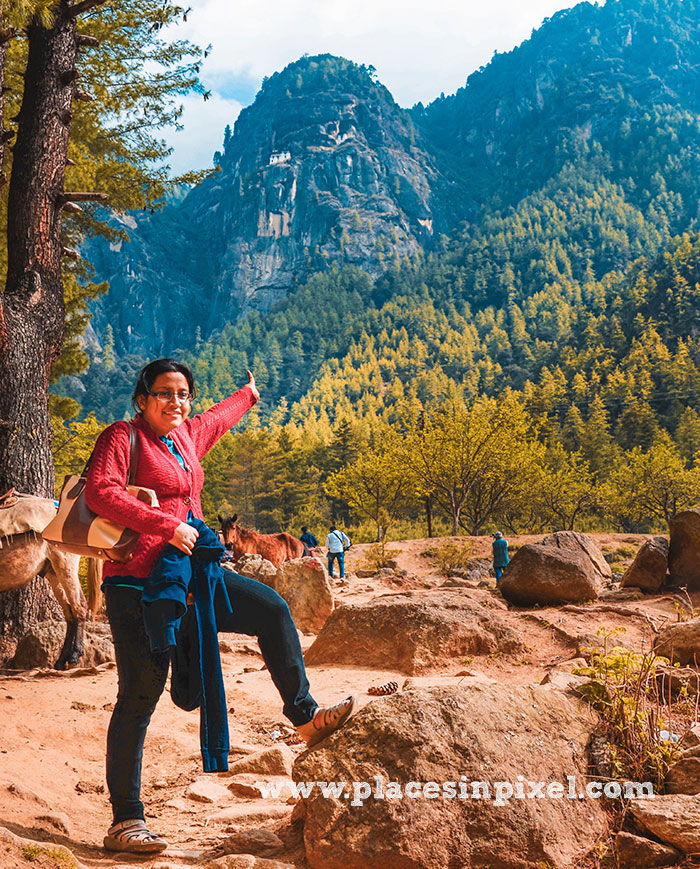
that tiny white colored thing on the cliff is the EPIC monastery!
After passing a creek and water-powered prayer wheels, the trail gradually starts getting steeper, but not overly steep. We felt it’s very doable for most people, just be prepared to take your time.
2nd Leg: Cafeteria to the viewpoint
Half way into the hike, we reached a cafeteria with arguably the best views – Taktsang Cafeteria! Around the cafeteria, the trail levels out for a little bit. Here, you can spin prayer wheels and enjoy the view.
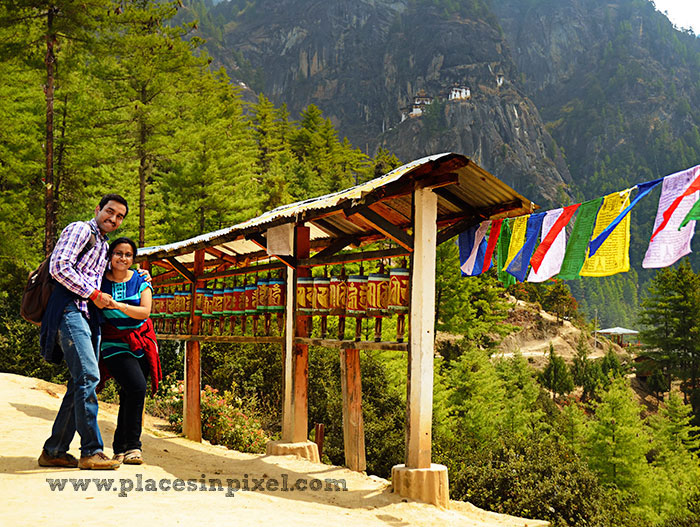
We continued climbing a few hundred meters after the cafeteria and reached the viewpoint that overlooks the Tiger’s Nest Monastery. This viewpoint is the BEST place to take photos of Taktsang.
Last leg: Tiger’s Nest Monastery
We lost the track of time having immersed ourselves in the absolute stunning view of the Tiger’s nest monastery from the viewpoint. Hence, we had to literally pull ourselves out of the trance, realizing it was time to descend a long flight of stairs. Then comes the final upward climb to the monastery taking you past a waterfall and getting you ready for the show-stopper!
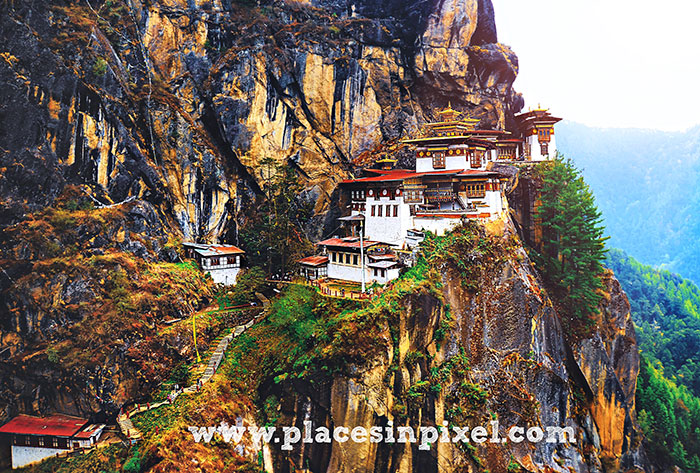
Built around the cave where Guru Rinpoche is said to have meditated, Paro Taktsang hangs on a precarious cliff at 3,120 m (10,240 ft) above sea level and about 900 m (3,000 ft) above the Paro valley. The rock slopes are very steep (almost vertical) and the monastery buildings are built into the rock face.
Before entering the monastery, you need to open your shoes and deposit all your belonging in the safety lockers (photography is not allowed inside). To me, entering inside Tiger’s Nest felt stepping into a different reality. The moment our feet came in contact with the cold floor, the sore ache that was there only moments earlier, dissipated completely! With no gadgets to distract us, no Instagram to make Story videos, no cameras to shoot photos, we immersed ourselves in relating to stories of Guru Rinpoche and the monastery.
There are several shrine rooms, chapels, sanctums, stupas and statues in each section of Tiger’s Nest Monastery. Sonakshi and I kept on wondering and imagining ‘how were the people able to bring all these here…‘
Paro Taktsang is so rich in preserved art, history and culture that its very tough to believe that the structure nearly perished in fire – twice! Faith resonates very strongly within the walls of the monastery and also among the people of Bhutan that it will take more than just fire to damage this divine monument..!!

we got PUBLISHED on the COVER of LONELY PLANET MAGAZINE !!
The downhill and return
Stepping out of the monastery gave us a small jolt back to reality – we would now have to climb down with nothing awesome to look forward to. It’s the same feeling that strikes me every time while returning back from a hike – be it Taktsang in Bhutan or Mt. Fuji in Japan. Between skipping the small stones or dodging horses’ droppings, it’s hard not to look back over your shoulder and stare at the Tiger’s Nest trek as it grows smaller and smaller.
There was that exhilarating realization in us that we had made a memory which wont fade away ever!!
Tiger’s Nest Monastery Facts That You Must Know
- Total Length of the hike (to & fro): 11 km (~ 6.8 miles)
- Monastery elevation: 3,120 m (10,240 ft)
- Total duration (to & fro): 5 – 7 hours (depending on your pace)
Tips for Tiger’s Nest Trek- summary
“Take on the trek, but do it at your own pace.. “
..advice from locals!
In the end…
We hope you liked reading this article about hiking up Tiger’s Nest Bhutan and we were able to inspire you to travel there. Please share this with your friends and family 🙂
If you have already been there, comment below your experience. Also, mention some of the challenging hikes that you done in the comments section.

Hello. This post was extremely interesting, particularly because I was looking for thoughts on this topic last Thursday.
Hello Thompson,
Thanks for your comment. 🙂
GREAT !! Very useful tips for hiking the Tiger’s Nest. I will definitely set aside an entire day for this hike because not many people in my friends’ group are very active!! 😉
We are glad that you found our blog informative and helpful.
cheers! have a great trip!
Great
Super duper writing and photography..
Thanks mom! 🙂
A very good information about tiger nest,as we are going to visit Bhutan on14th Sept.Excellent photography.
Thank you you so much 🙂
Have a great trip.. let me know if you need any help.
Congratulations on the lonely planet publication! Amazing! Looks like a wonderful hike.
Thanks a lot… and yes, its indeed wonderful 🙂
This looks amazing! Thanks for the helpful tips – I know I will come back to them if we are ever heading to the region! And congratulations on bagging the cover shot!
Thank you soo much Rachael.
Sure, please do come back when needed and feel free contact us 🙂
Wow this hike looks fabulous and I love the photos xx
That’s correct Stephanie, its indeed a fabulous hike! 🙂
V.nice, excellent. Daroon photography.
Thank you so much mamuni.. 🙂
Wow! A truly inspiring place to visit. You’ve listed lots that are needed. A worthy spot to visit – thanks for your informative post.
Yes Deborah, Bhutan in general and Tiger’s nest in particular are really inspiring! 🙂
Nice photography
Thanks Aron!
Bhutan is so beautiful. Thanks for sharing.
Indeed 🙂
Wonderful photography…. I am inspired to visit Bhutan soon…
thank you so much..
Oh wow this sounds incredible!
Such great pics too!
Thank you Natalie 🙂